Getting Started with ESP32 and MQTT: A Beginner's Guide
February 24, 2026
Connecting Your ESP32 to the IoT World with MQTT
The ESP32 is a powerful, low-cost microcontroller with integrated Wi-Fi, making it a perfect choice for IoT projects. One of the most effective ways to make your ESP32 project truly "smart" is by connecting it to an MQTT broker using the MQTT protocol. This allows your device to send data and receive commands from other clients.
This guide will walk you through the entire process, from setting up your hardware and software to writing the Arduino code to publish sensor data and control an LED, creating a foundational smart home device.
Project Goal
We will build a simple IoT device using an ESP32 that reads temperature data from a sensor and publishes it to an MQTT topic. We will also subscribe to another topic to control an onboard LED remotely.
Prerequisites
- An ESP32 development board.
- A DHT11 or DHT22 temperature and humidity sensor.
- An LED and a 220Ω resistor.
- A breadboard and some jumper wires.
- The Arduino IDE installed on your computer.
- Access to an MQTT broker (e.g., a public one, or your own broker on a Raspberry Pi).
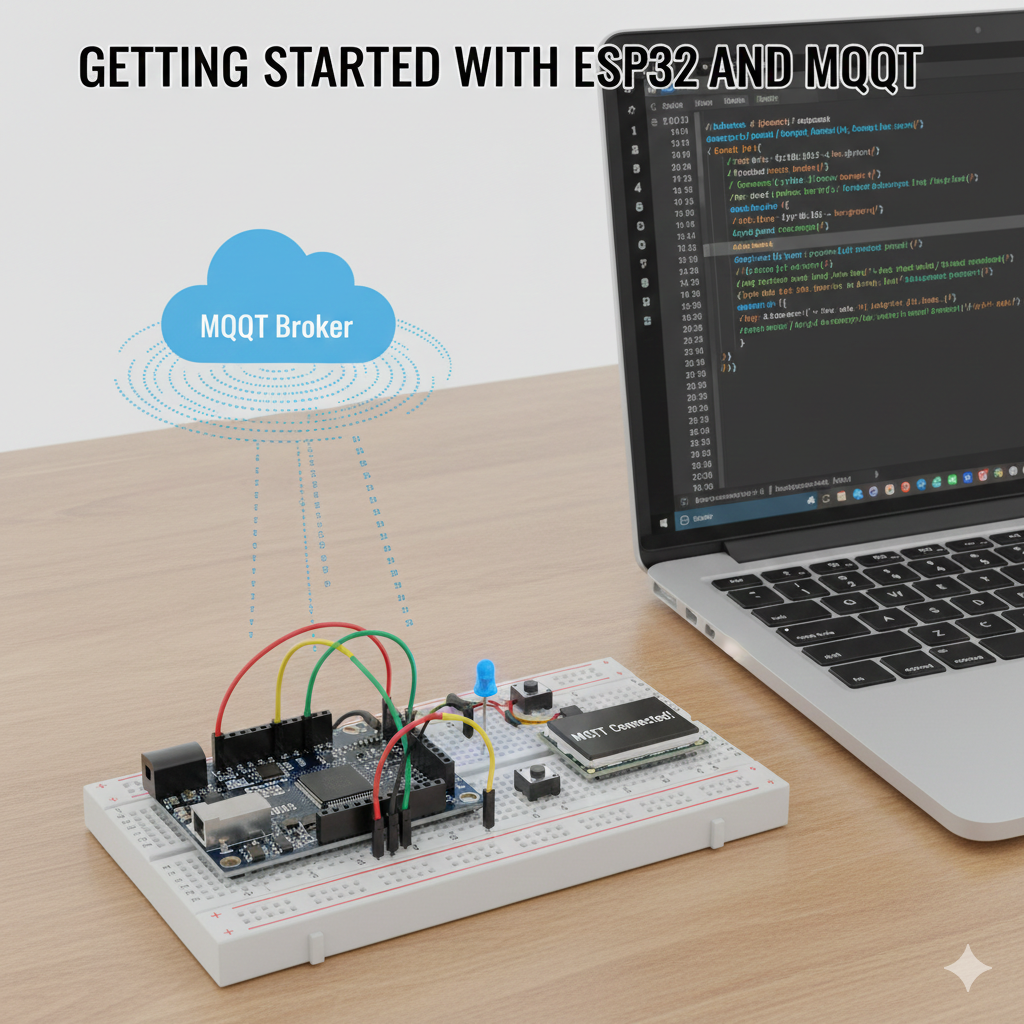
Step 1: Hardware Setup
The wiring is straightforward. Connect the components on your breadboard as shown in the diagram below.
Step 2: Arduino IDE Setup
- Add ESP32 Board Manager: Add the official Espressif URL in
File > Preferences. - Install Libraries: In the Library Manager, search for and install
PubSubClientby Nick O'Leary, and theDHT sensor libraryby Adafruit.
Step 3: The Arduino Code
Here is the complete code. Replace the placeholder values for your Wi-Fi credentials and MQTT broker details.
#include <WiFi.h>
#include <PubSubClient.h>
#include <DHT.h>

// --- WiFi & MQTT Configuration ---
const char* ssid = "YOUR_WIFI_SSID";
const char* password = "YOUR_WIFI_PASSWORD";
const char* mqtt_server = "broker.hivemq.com"; // Or your private broker

// --- Topics ---
const char* temp_topic = "esp32/temperature";
const char* led_topic = "esp32/led/control";

// --- Hardware Pins ---
#define DHTPIN 4
#define DHTTYPE DHT11
#define LED_PIN 2

WiFiClient espClient;
PubSubClient client(espClient);
DHT dht(DHTPIN, DHTTYPE);

void callback(char* topic, byte* payload, unsigned int length) {
  String message;
  for (int i = 0; i < length; i++) { message += (char)payload[i]; }

  if (String(topic) == led_topic) {
    if (message == "1") { digitalWrite(LED_PIN, HIGH); }
    else if (message == "0") { digitalWrite(LED_PIN, LOW); }
  }
}

void reconnect() {
  while (!client.connected()) {
    if (client.connect("ESP32Client")) {
      client.subscribe(led_topic);
    } else {
      delay(5000);
    }
  }
}

void setup() {
  Serial.begin(115200);
  pinMode(LED_PIN, OUTPUT);
  dht.begin();
  WiFi.begin(ssid, password);
  while (WiFi.status() != WL_CONNECTED) { delay(500); }
  client.setServer(mqtt_server, 1883);
  client.setCallback(callback);
}

void loop() {
  if (!client.connected()) { reconnect(); }
  client.loop();

  // Publish temperature every 5 seconds
  static unsigned long lastMsg = 0;
  if (millis() - lastMsg > 5000) {
    lastMsg = millis();
    float t = dht.readTemperature();
    if (!isnan(t)) {
      client.publish(temp_topic, String(t).c_str(), true);
    }
  }
}
Step 4: Upload and Test
- Configure & Upload: Fill in your details, select your ESP32 board/port, and upload.
- Monitor: Open the Serial Monitor to see the connection status.
- Test: Use an MQTT client to subscribe to
esp32/temperatureand publish1or0toesp32/led/control.
Congratulations! You have built a basic but fully functional IoT device that integrates seamlessly with the greater MQTT ecosystem.
Detailed Exploration of ESP32 and MQTT Capabilities
The initial guide provides a fantastic starting point for anyone venturing into the world of IoT with the ESP32 and MQTT. However, the journey doesn’t end with a blinking LED and a temperature reading. The combination of this powerful microcontroller and lightweight messaging protocol unlocks a vast landscape of sophisticated applications. This extended guide will delve deeper into advanced concepts, alternative development environments, and real-world project scenarios, equipping you with the knowledge to build robust, efficient, and scalable IoT solutions.
Advanced ESP32 MQTT Techniques for Robust Projects
To move from a simple proof-of-concept to a reliable, battery-powered device, you need to master more advanced techniques.
1. Power Saving with Deep Sleep and MQTT
For many IoT applications, especially those running on batteries (like a remote weather station or a door sensor), continuous operation is not feasible. The ESP32's Wi-Fi radio is power-hungry. The solution is Deep Sleep mode. In this state, the ESP32 shuts down most of its components, consuming only a few microamps of current, and can wake up based on a timer or an external trigger.
How it works with MQTT: The device wakes up, connects to Wi-Fi and the MQTT broker, publishes its data (e.g., a sensor reading), and then immediately goes back to sleep for a predetermined interval.
Key considerations:
- Connection Overhead: Establishing a Wi-Fi and MQTT connection on every wake-up cycle has a power cost. The goal is to make this "wake time" as short as possible.
- Last Will and Testament (LWT): What if the device fails to reconnect? This is where MQTT's LWT feature is invaluable. The client tells the broker to publish a specific message to a specific topic if it disconnects ungracefully (e.g., loses power). A monitoring service can subscribe to this topic to know the device has gone offline.
- Retained Messages: When the ESP32 publishes its data, setting the
retainflag to true tells the broker to hold onto that message. Any new client that subscribes to the topic will immediately receive the last known value, even if the ESP32 is currently asleep.
Example Code Snippet (Conceptual):
// After publishing the message...
client.disconnect();
Serial.println("Going to sleep now");
esp_sleep_enable_timer_wakeup(60 * 1000000); // Sleep for 60 seconds
esp_deep_sleep_start();
This approach is fundamental for creating low-power ESP32 MQTT sensor nodes.
2. Over-the-Air (OTA) Updates via MQTT
Imagine you've deployed 50 sensors in a field. If you find a bug or want to add a feature, you don't want to physically retrieve each one. OTA updates are the answer. While the ArduinoOTA library provides a way to do this over your local network, you can orchestrate it remotely using MQTT.
The Workflow:
- Your ESP32 subscribes to a specific OTA topic, e.g.,
myhome/devices/esp32-weather-station/ota/update. - Your update server (which could be a simple script on a Raspberry Pi or a cloud function) publishes a message to this topic. The message contains a URL pointing to the new firmware binary (
.binfile). - The ESP32 receives the message, downloads the binary from the URL, verifies it, and reboots into the new firmware.
This turns your MQTT broker into a powerful device management tool, allowing you to update firmware for your entire fleet of ESP32 MQTT devices from a central location.
3. Using JSON for Structured Data Payloads
Sending a simple value like 23.5 is fine for temperature, but what if you want to send temperature, humidity, and pressure all at once? Or control an RGB LED with red, green, and blue values? Stringing them together (23.5,60,1012) is brittle. The standard solution is JSON (JavaScript Object Notation).
Example JSON Payload:
{
  "temperature": 23.5,
  "humidity": 60,
  "unit": "celsius"
}
Benefits:
- Readability: It's human-readable and self-describing.
- Extensibility: You can add new key-value pairs without breaking existing clients.
- Compatibility: Virtually all programming languages and IoT platforms understand JSON.
The ArduinoJson library is the go-to tool for creating and parsing JSON on the ESP32. It's incredibly efficient and minimizes the memory footprint, which is crucial on a microcontroller.
Example Code Snippet (Sending JSON):
#include <ArduinoJson.h>

// ... inside your loop ...
StaticJsonDocument<200> doc;
doc["temperature"] = dht.readTemperature();
doc["humidity"] = dht.readHumidity();

char jsonBuffer[512];
serializeJson(doc, jsonBuffer);

client.publish(data_topic, jsonBuffer);
Beyond Arduino IDE: ESP32 MQTT with MicroPython
While the Arduino IDE is excellent for beginners, many developers prefer Python for its simplicity and rapid development cycle. MicroPython is a lean and efficient implementation of the Python 3 programming language that runs directly on the ESP32.
Why use MicroPython for ESP32 MQTT?
- Ease of Use: Python's syntax is famously clean and concise.
- Interactive REPL: You can connect to the ESP32 and execute code line by line, which is fantastic for debugging and experimentation.
- Rich Libraries: A growing ecosystem of libraries makes it easy to work with hardware and network protocols.
Setting up MicroPython:
- Flash Firmware: Download the latest MicroPython firmware for the ESP32 from the official website. Use a tool like
esptool.pyto flash it onto your board. - IDE/Editor: Use an editor like Thonny, which has built-in support for interacting with MicroPython devices.
MicroPython MQTT Client Code Example:
import time
from umqtt.simple import MQTTClient

# MQTT Configuration
MQTT_BROKER = "broker.hivemq.com"
MQTT_CLIENT_ID = "esp32-micropython-client"
MQTT_TOPIC = "esp32/micropython/test"

# Connect to Wi-Fi (function not shown, but necessary)
# ... connect_wifi() ...

def mqtt_callback(topic, msg):
    print(f"Received message: {msg.decode()} on topic {topic.decode()}")

client = MQTTClient(MQTT_CLIENT_ID, MQTT_BROKER)
client.set_callback(mqtt_callback)
client.connect()
client.subscribe(b"esp32/led/control") # Subscribe to the same LED topic

while True:
    # Check for incoming messages
    client.check_msg()

    # Publish a message every 5 seconds
    client.publish(MQTT_TOPIC, "Hello from MicroPython!")
    time.sleep(5)
This Micropython ESP32 MQTT example demonstrates the core difference in syntax and structure but achieves the same goal as the C++/Arduino code.
Choosing the Right MQTT Broker
Your ESP32 is just one half of the equation. The broker is the central nervous system of your IoT application.
- Public Brokers (like
broker.hivemq.com): Excellent for quick tests and tutorials. Never use them for production or sensitive data. They are open and insecure. - Cloud-Managed Brokers:
- AWS IoT Core: Highly scalable, integrates with the entire AWS ecosystem. Can be complex to set up initially.
- Google Cloud IoT Core: Similar to AWS, offers powerful data and device management tools.
- Adafruit IO: Beginner-friendly, with great dashboards and a free tier. Less flexible than AWS/Google but much easier to start with.
- HiveMQ Cloud: A fully managed MQTT platform that is easy to scale and very reliable.
- Self-Hosted Brokers:
- Mosquitto: The most popular open-source MQTT broker. Lightweight enough to run on a Raspberry Pi, giving you full control over your data and security.
- EMQX: An open-source, highly scalable broker designed for large-scale enterprise deployments.
For any serious project, you must use a broker that supports TLS/SSL encryption and requires username/password authentication.
Troubleshooting Common ESP32 MQTT Problems
When things go wrong, a systematic approach can save hours of frustration.
-
Wi-Fi Connection Issues:
- Symptom: The ESP32 never gets past the
WiFi.begin()loop. - Checks: Double-check your SSID and password. Ensure your router is 2.4GHz compatible (some ESP32 models struggle with 5GHz). Check the signal strength.
- Symptom: The ESP32 never gets past the
-
MQTT Connection Refused:
- Symptom:
client.connect()returnsfalse. The serial monitor might show error codes. - Checks:
- Broker Address: Is the server address correct? Did you make a typo?
- Port: Are you using the correct port? (1883 for unencrypted, 8883 for TLS/SSL).
- Firewall: Could a firewall be blocking the port?
- Authentication: If your broker requires a username/password, did you provide them correctly in
client.connect("ClientID", "user", "pass")? - Client ID: Some brokers require a unique client ID for each connection. If another device is using the same ID, you'll be rejected.
- Symptom:
-
Messages Not Being Received:
- Symptom: You publish a message, but the subscriber never sees it.
- Checks:
- Topic Mismatch: This is the most common cause. A simple typo (
esp32/tempvsesp32/temperature) will cause the message to be lost. MQTT topics are case-sensitive. - Wildcards: Are you using wildcards (
#or+) correctly in your subscription topic? client.loop(): Are you callingclient.loop()frequently in your main loop? This function is responsible for processing incoming messages. If you block the loop with long delays (delay(5000)), you will miss messages. Use a non-blocking approach withmillis()instead, as shown in the original example.
- Topic Mismatch: This is the most common cause. A simple typo (
Expanding the Project: Real-World Applications
With the fundamentals covered, let's explore more inspiring ESP32 MQTT project ideas:
- Industrial IoT (IIoT): Connect industrial sensors (e.g., Modbus or OPC-UA) to an ESP32, which then acts as a gateway to publish data to a central MQTT broker for monitoring and analysis.
- Smart Agriculture: Deploy battery-powered ESP32 nodes with soil moisture sensors. They can sleep for an hour, wake up, publish the moisture level, and allow a central system to decide when to activate water pumps (via another MQTT message).
- Home Security System: Use motion sensors (PIR) and door/window sensors (reed switches) connected to ESP32s. When a sensor is triggered, it publishes an MQTT message. A central controller (like a Raspberry Pi running Home Assistant) can then send a notification to your phone.
- Fleet Management: Install ESP32s with GPS modules in vehicles. The devices can periodically publish their location coordinates to an MQTT broker, allowing for real-time tracking on a map dashboard.
This deeper dive illustrates that the "Getting Started" guide is just the first step. By incorporating deep sleep, OTA updates, and structured data with JSON, and by choosing the right development environment and broker, your ESP32 MQTT projects can become as professional and reliable as commercial IoT solutions. The key is the lightweight, decoupled nature of the publish-subscribe model, which allows your simple sensor node to communicate effectively with a complex and powerful ecosystem.