Case Study: Large-Scale Smart Home Automation with MQTT | 21% Energy Savings
February 22, 2026
Introduction: The Rise of Intelligent Living Spaces
Smart home automation is no longer a luxury reserved for high-end residential projects. It has evolved into a practical, scalable, and energy-efficient solution for modern households. With rising electricity costs, increasing security concerns, and the demand for remote convenience, homeowners are adopting IoT-driven automation systems that provide centralized visibility and control. This article is a detailed cluster page supporting our main MQTT Dashboard guide.
This in-depth case study explores how a premium gated residential community implemented a scalable MQTT-based smart home automation architecture integrated with the MQTTfy Dashboard as the centralized monitoring and control layer.
Smart Home Automation Case Study Overview
Project Profile
- Project Type: Gated Residential Community
- Number of Villas: 180
- Average Size per Villa: 3,000 sq. ft.
- Location: Urban Tier-1 City
- Automation Coverage: Lighting, HVAC, Security, Energy Monitoring, Water Systems
- Total IoT Devices Deployed: 5,400+
- Timeline: 5 Months Deployment
Business Challenges Before Automation
Before implementing IoT-enabled smart home automation, the residential community faced several operational and comfort-related challenges:
-
High Energy Consumption
Residents experienced 18–25% higher electricity bills due to:
- Inefficient HVAC usage
- Lights left on in unoccupied rooms
- Lack of real-time energy monitoring
-
Limited Remote Access
Homeowners traveling frequently lacked:
- Remote surveillance control
- Real-time alerts
- Appliance status visibility
-
Security Gaps
The community relied on:
- Standalone CCTV systems
- Manual guard monitoring
- No centralized event logging
-
Maintenance Inefficiencies
Water pump failures and electrical faults were often detected late, leading to inconvenience and service complaints.
-
No Centralized Dashboard
Each villa had isolated smart devices with no unified monitoring platform.
The solution required:
- A scalable IoT communication protocol
- Low-latency messaging
- A real-time MQTTfy Dashboard
- Secure authentication
- Multi-user access roles
- Energy analytics
- Automation rules engine
Why MQTT Was Selected for Smart Home Automation
Lightweight Messaging for IoT
MQTT (Message Queuing Telemetry Transport) was chosen because:
- It is a lightweight publish-subscribe protocol
- Designed for low bandwidth environments
- Provides reliable QoS levels
- Supports retained messages
- Scales to thousands of devices
- Works seamlessly with cloud dashboards
Compared to HTTP polling systems, MQTT reduced network overhead by 60%.
Smart Home Automation Architecture
The system architecture followed a layered IoT model:
Smart Devices → Local Edge Gateway → MQTT Broker → MQTTfy Dashboard
-
Layer 1: Smart Home Devices
Devices installed per villa included:
- Smart switches
- Motion sensors
- Door/window sensors
- Smart thermostats
- Energy meters
- Water level sensors
- Smart plugs
- IP cameras
- Smoke detectors
Average devices per villa: 30. Each device published state updates every 5–20 seconds depending on type.
-
Layer 2: Edge Gateway
Each villa had a compact edge gateway installed in the utility panel. Gateway responsibilities included local device discovery, protocol translation (Zigbee/BLE), local rule execution, and offline caching.
-
Layer 3: Cloud MQTT Broker Cluster
A managed MQTT broker cluster was configured with TLS encryption, device-level authentication tokens, and high availability.
-
Layer 4: MQTTfy Dashboard Integration
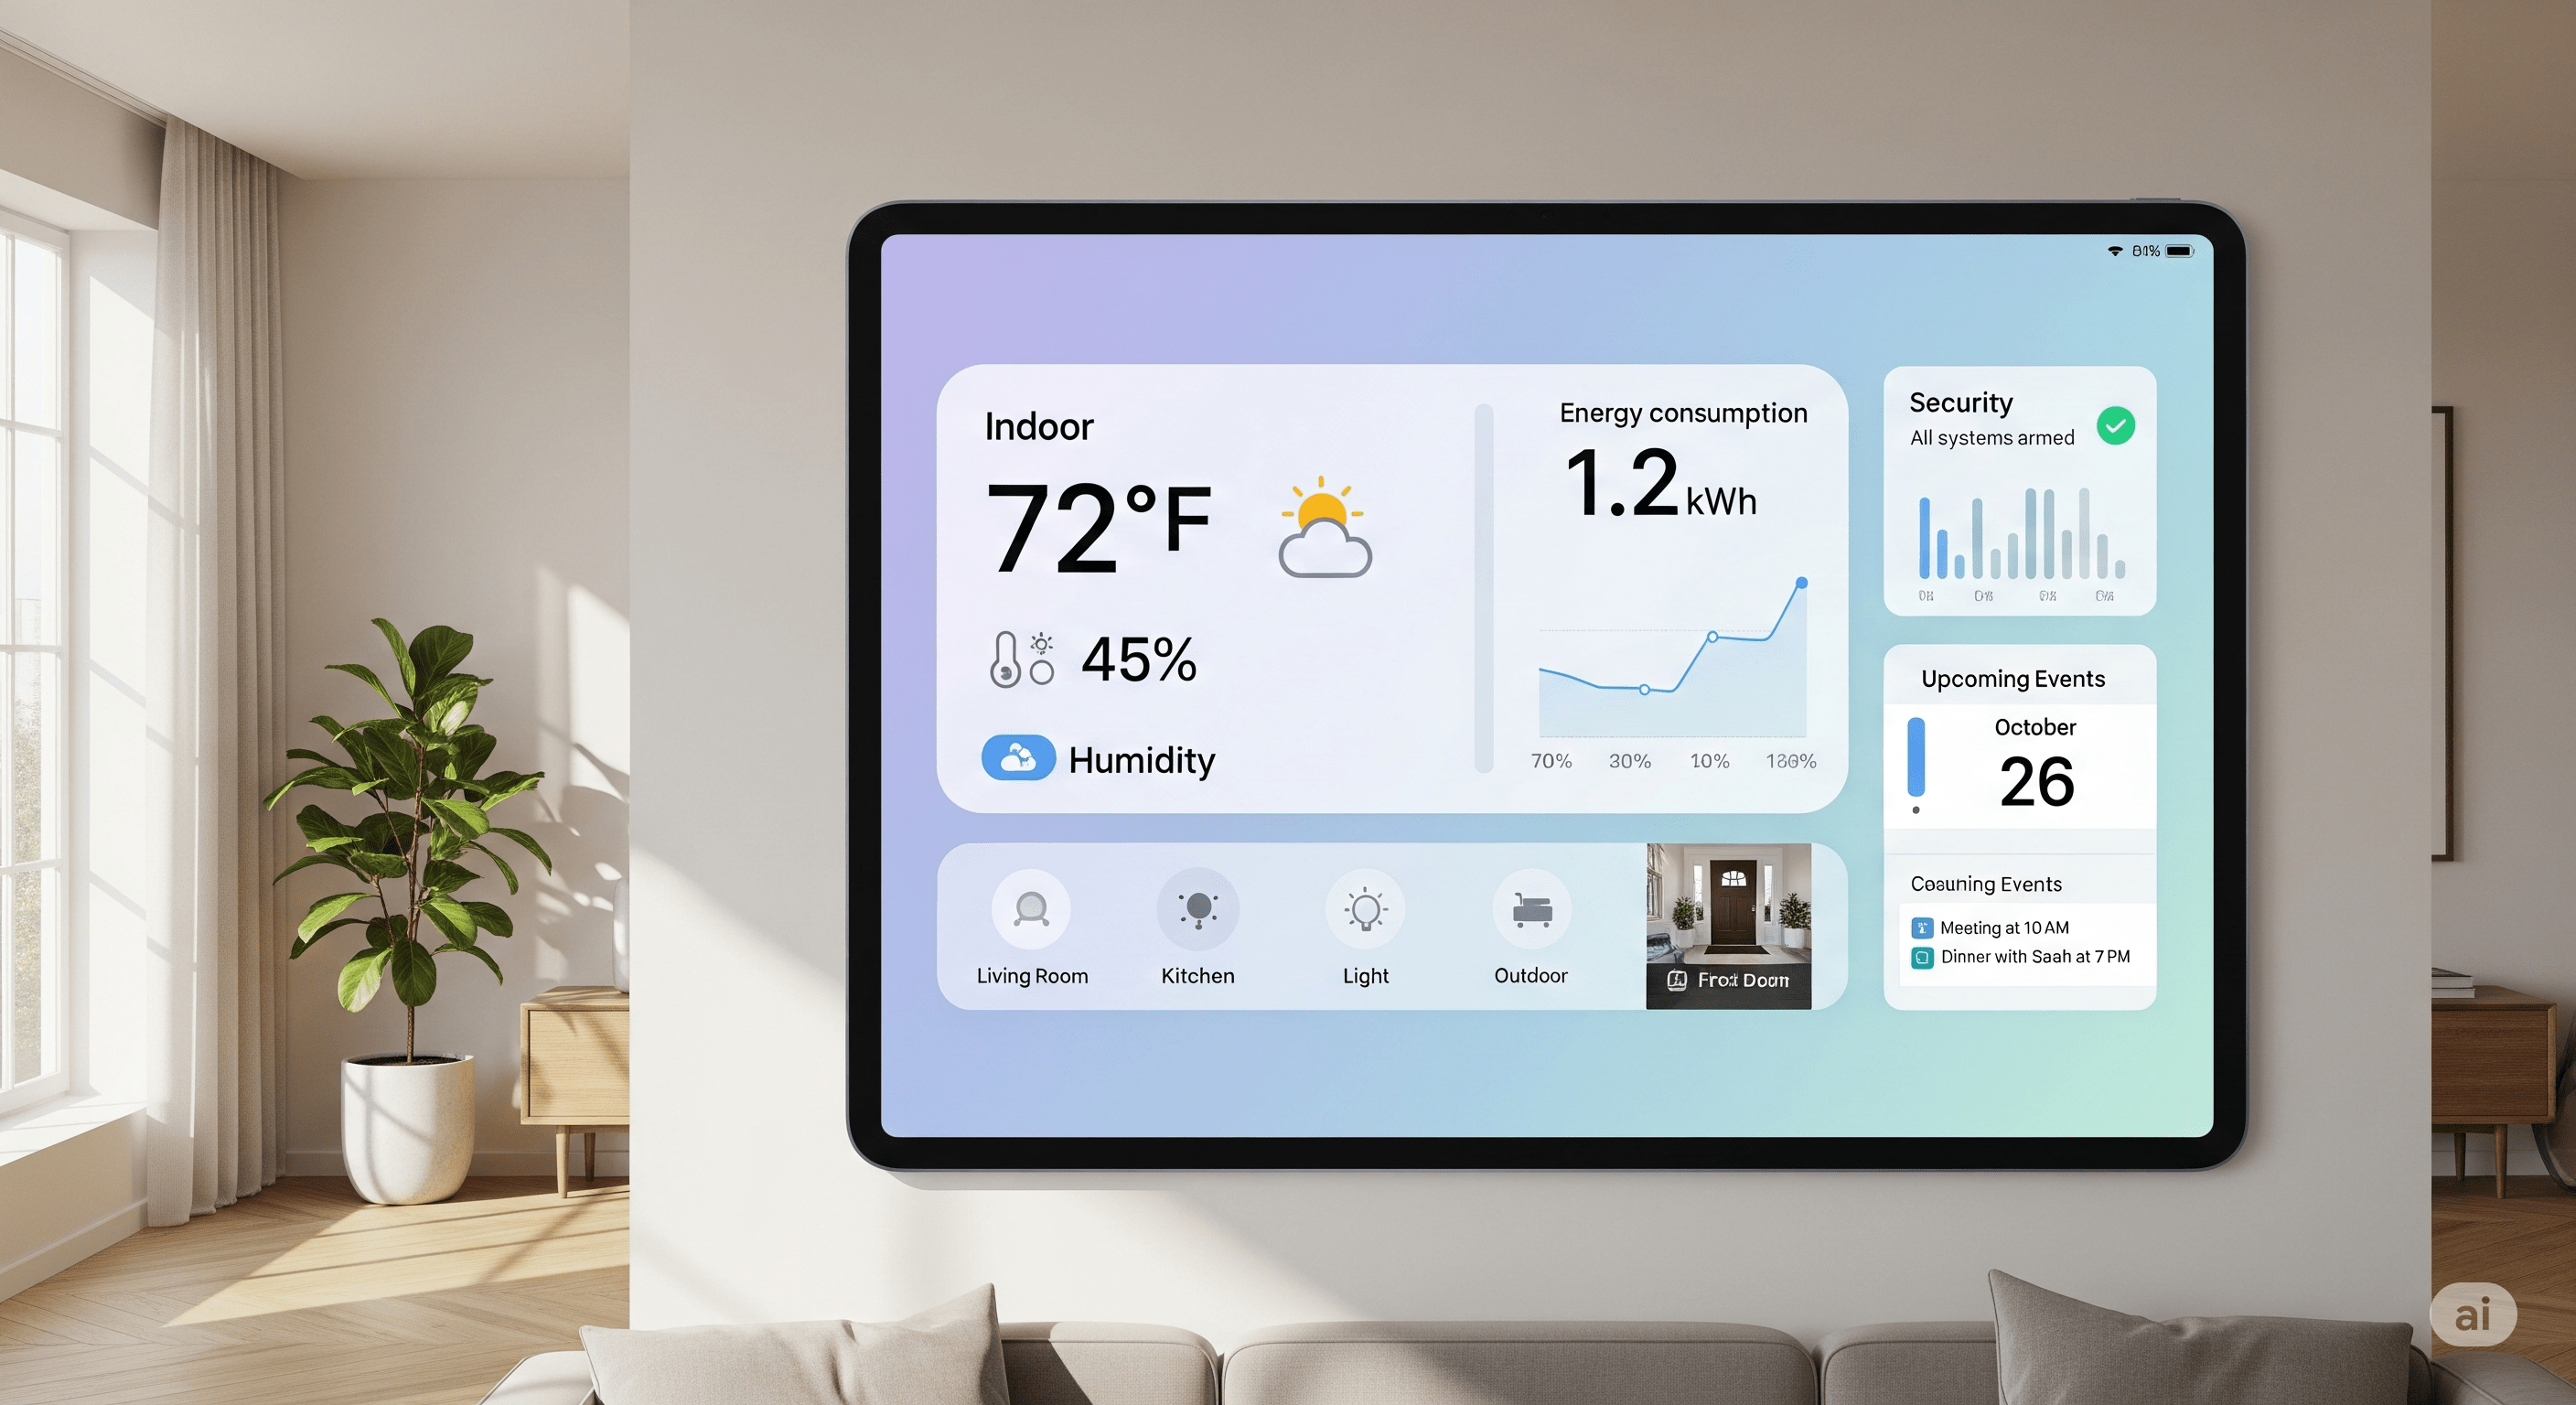
The MQTTfy Dashboard served as the central command center, providing real-time device tiles, energy graphs, security alerts, and historical analytics.
Deployment Strategy
- Phase 1: Pilot Implementation (20 Villas): A successful pilot validated device reliability and latency (99.4% message delivery, 1.2s average latency).
- Phase 2: Full Community Rollout: 180 villas were automated with 5,400 devices and 180 edge gateways over 12 weeks.
Smart Energy Monitoring Implementation
Energy monitoring was a primary driver of ROI. Each villa had a main energy meter, circuit-level monitoring, and smart plug analytics. After 6 months, this resulted in an average electricity reduction of 21%. This is a great example of the principles covered in our energy management case study.
Smart HVAC Optimization
Temperature sensors integrated with automated thermostat rules based on occupancy and scheduling reduced compressor runtime and increased appliance lifespan.
Smart Security Integration
Security modules included motion-trigger alerts, door open notifications, and smoke detection alarms delivered via push notification, SMS, and email, with an average alert delay of 1.5 seconds. The use of camera widgets was crucial here.
Data Modeling Strategy
A structured topic hierarchy was followed: organization/project/[villa]/device/[metric]. This clean separation allowed for easy wildcard subscriptions and efficient data filtering.
Automation Engine
Automation rules executed at both the local gateway and cloud level, allowing residents to configure automations like turning on porch lights at sunset.
Security Architecture
Security was implemented in multiple layers, including TLS 1.2 encryption, token-based access, topic-based ACLs, and network segmentation.
Performance Metrics
The system capacity handles 60,000 MQTT messages per minute with 99.98% broker uptime.
Financial Analysis and ROI
| Metric | Value |
|---|---|
| Total Project Cost | ₹3.75 Crore |
| Annual Savings (Energy & Maintenance) | ₹1.45 Crore |
| Return on Investment (ROI) | 2.4 Years |
| Property Value Increase | 12% Resale Premium |
Resident Experience Impact
Post-implementation surveys showed an 87% satisfaction increase, with 72% of residents using the mobile dashboard daily. The principles of building an effective IoT dashboard were key to this adoption. The same principles apply to large-scale projects like smart cities.
Sustainability Benefits
Smart home automation reduced electricity waste, water overflow incidents, and the community’s carbon footprint, contributing to the goals outlined in our environmental monitoring article. Better data visualization helped residents understand their consumption.
Scalability Blueprint
The MQTT architecture supports horizontal scaling for the next expansion phase, which includes 500 additional apartments, EV charging station integration, solar panel monitoring, and smart parking automation, similar to the challenges in fleet management.
Lessons Learned
- Design structured MQTT topics early.
- Use edge fallback automation.
- Test network reliability extensively.
- Train residents on dashboard usage.
- Monitor gateway health continuously, a practice also seen in industrial monitoring.
- Plan scalability from day one.
Why This Smart Home Case Study Matters
Modern residential automation demands real-time visibility, secure messaging, energy analytics, and predictive maintenance. MQTT combined with a centralized IoT dashboard enables high device density scalability, low bandwidth usage, secure communication, and flexible automation rules. The MQTTfy Dashboard acts as the visualization and intelligence core that converts raw device telemetry into actionable residential insights.
Future Roadmap
Upcoming features include AI-powered energy optimization, voice assistant integration, solar energy analytics, and smart grid participation. Smart home ecosystems are evolving toward autonomous, self-optimizing environments.
Conclusion: Building Intelligent Living with MQTT and MQTTfy Dashboard
This smart home automation case study demonstrates how a structured MQTT-based architecture integrated with the MQTTfy Dashboard can deliver a 21% energy reduction, enhanced security, centralized monitoring, scalable IoT infrastructure, and improved resident satisfaction for a long-term financial ROI. As residential IoT adoption accelerates, MQTT-powered smart home systems will become foundational infrastructure, delivering measurable efficiency, safety, and convenience. With MQTT as the communication backbone and MQTTfy Dashboard as the intelligence layer, connected living becomes scalable, secure, and future-ready.
Frequently Asked Questions
What is the role of an MQTT broker in a smart home?
An MQTT broker acts as the central communication hub for all smart devices. Instead of devices talking directly to each other, they publish messages to the broker on specific 'topics' and subscribe to topics to receive messages. This decouples the devices, creating a highly reliable and scalable system where devices from any brand can interact as long as they speak the MQTT protocol.
Can I use an MQTT dashboard to connect devices from different brands?
Yes, absolutely. This is one of the primary benefits. As long as your smart devices (or a hub they connect to, like Home Assistant or Zigbee2MQTT) can publish data to an MQTT broker, the dashboard can display it. This allows you to unify control of devices from Google, Amazon, Philips Hue, and custom DIY projects all in one place.
What is a good MQTT topic structure for smart lights?
A robust topic structure for a light in the living room might be: 'home/livingroom/light/status' for reporting its state (e.g., ON/OFF, brightness), and 'home/livingroom/light/set' for sending commands. Using this pattern consistently across all devices makes the system predictable and easy to manage.
How does a dashboard button turn on a physical light?
The process is a simple command flow: 1) You press a Button widget on the dashboard. 2) The dashboard publishes a message (e.g., a JSON payload like {"state": "ON"}) to a command topic on the MQTT broker (e.g., 'home/livingroom/light/set'). 3) The light bulb or a controller it's connected to is subscribed to that topic, receives the message, and executes the command to turn on.
Do I need to use Home Assistant or Node-RED to have an MQTT dashboard?
No, you don't have to, but they serve different purposes. You can have devices that speak MQTT directly and a dashboard that communicates with them. However, platforms like Home Assistant and Node-RED are powerful automation engines and gateways. They are excellent for integrating non-MQTT devices (like Zigbee or Z-Wave) into your MQTT ecosystem, and for creating complex automation rules that run in the background, independent of the dashboard.